Understanding the basics of virtualization is a good skill to possess in an age when it seems like everything is going virtual or to the cloud.
While Virtualbox may cut it for hobbyists, VMware is the numero uno vendor when it comes to virtualization.
If you ask me, VMware is to virtualization what Cisco is to networking gear.

VMware – Multiple Offerings
VMware ESXi is for the enterprise while Workstation 16 Pro and Workstation Player do the job well in smaller outfits.
VMware ESXi is overkill for my requirements and its installation is also more complex.
So I opted for VMware Workstation 16 Pro (a Type-2 hypervisor) unlike VMware ESXi, which is a Type-1 hypervisor aka bare metal hypervisor for my Linux Mint 21 computer.
By the way, VMware Workstation 16 Pro is also available for Windows.
Download Workstation 16 Pro
VMware offers two locations to download Workstation 16 Pro software for Linux:
1. https://www.vmware.com/products/workstation-pro/workstation-pro-evaluation.html
2. https://customerconnect.vmware.com/en/downloads/info/slug/desktop_end_user_computing/vmware_workstation_pro/16_0
You can download a 30-day free evaluation copy of VMware Workstation 16 Pro or buy the software outright from VMware or resellers.
After downloading Workstation 16 Pro, make sure you do a sha256sum check to ensure file integrity of the download.
Install VMware Workstation 16 Pro
These are the five steps I followed in installing and testing VMware Workstation 16 Pro on my Linux Mint 21 computer:
Step 1: I made sure I had installed gcc (GNU C compiler) and build-essential. gcc was already on my computer but build-essential was not. So I quickly installed it.
$ sudo apt install build-essential
Step 2: Next, I went to to my Downloads folder (where I had downloaded Workstation 16 Pro) and ran the below command:
$ sudo chmod a+x VMware-Workstation-Full-16.2.4-20089737.x86_64.bundle
Step 3: Complete the Installation:
$ sudo ./VMware-Workstation-Full-16.2.4-20089737.x86_64.bundle
Extracting VMware Installer…done.
Installing VMware Workstation 16.2.4
Configuring…
[######################################################################] 100%
Installation was successful.
Although there was no need to do so, I now did a reboot of my Linux Mint 21 system.
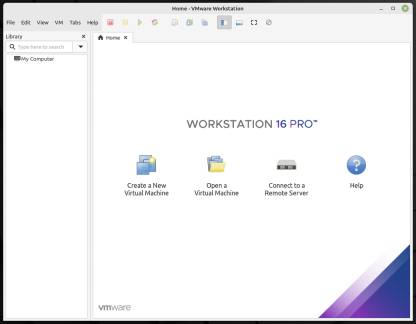
Step 4: Go to Menu in bottom left of your Linux Mint 21 PC and select VMware WorkStation and go through the various install prompts to launch the virtualization software.
Step 5: Test Out VMware Workstation 16 Pro by installing a Guest OS on it.

I’ve already downloaded AlmaLinux 9, RockyLinux 9 (both Alma and Rocky are Red Hat 9 clones) and Manjaro ISOs.
In my next post, I will write about installing one of them as a guest OS on my new Linux Mint 21 host via VMware Workstation 16 Pro.

Sorry, the comment form is closed at this time.